Install  CloudBuddy on
  Nvidia Jetson
CloudBuddy
CloudBuddy is the ultimate wizard for cloud storage. Google Drive, Onedrive, Dropbox, and many more.
Botspot made this gui frontend for the popular rclone tool to connect to your cloud drives, download from them, upload to them, mount them to your file manager, and more. In addition, CloudBuddy features an interactive file browser to easily generate shareable links and to perform various server-side operations.To run: Menu -> Internet -> CloudBuddy
To run in terminal: ~/cloudbuddy/main.sh
Fortunately, CloudBuddy is very easy to install on your Nvidia Jetson in just two steps.
- Install Pi-Apps - the best app installer for Nvidia Jetson.
- Use Pi-Apps to install CloudBuddy.
Compatibility
For the best chance of this working, we recommend using the latest version of Nvidia Jetpack for your specific Jetson (Jetson Xavier or Jetson Orin).
CloudBuddy will run on L4T Ubuntu ARM64.
Install Pi-Apps
Pi-Apps is a free tool that makes it incredibly easy to install the most useful programs on your Nvidia Jetson with just a few clicks.
Open a terminal and run this command to install Pi-Apps:
wget -qO- https://raw.githubusercontent.com/Botspot/pi-apps/master/install | bashFeel free to check out the Pi-Apps source code here: https://github.com/Botspot/pi-apps
Install CloudBuddy
Now that you have Pi-Apps installed, it is time to install CloudBuddy.
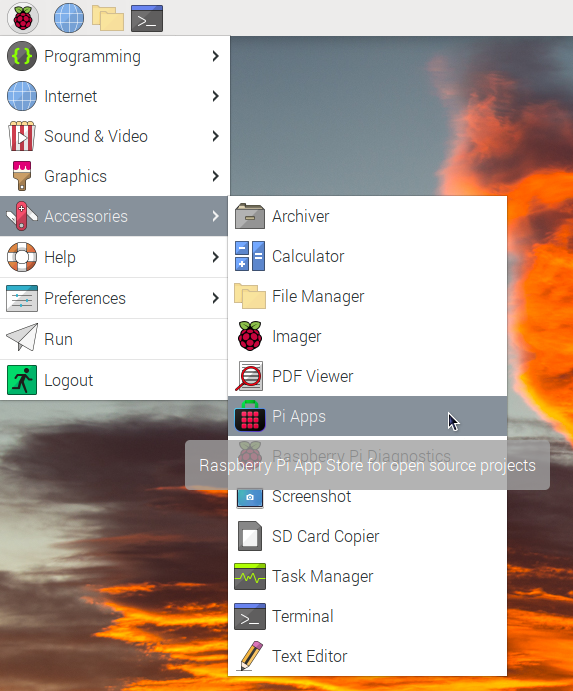
First launch Pi-Apps from your start menu:
Then click on the Internet category, which leads to the Download & Upload category.
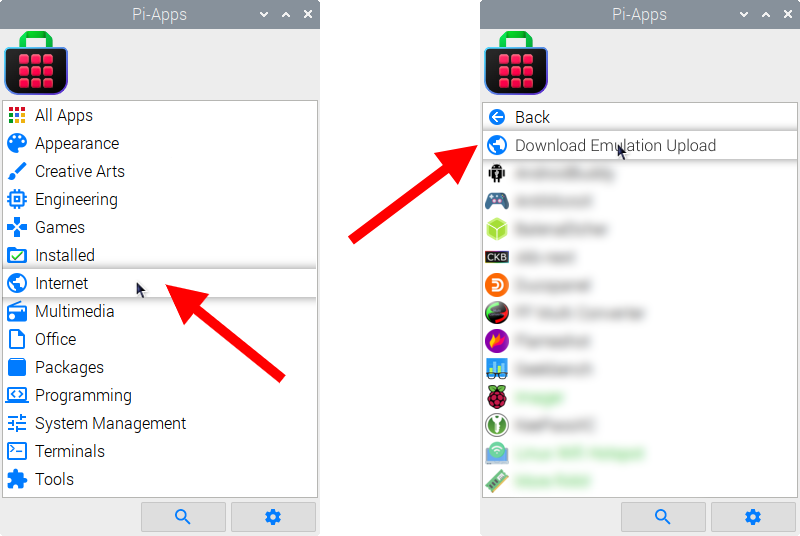
Now scroll down to find CloudBuddy in the list.
![]()
Just click Install and Pi-Apps will install CloudBuddy for you!
Pi-Apps is a free and open source tool made by Botspot, theofficialgman, and other contributors. Find out more at https://pi-apps.io